You can add a new printer by following these instructions.
1. Check the Printer Specifications
First of all you should check that the printer you intend to use will be compatible with OpenForms. The printer should have the following attributes:
- Colour laser printer
- At least 600dpi
- Support PostScript or PDF print files
- Have Toner-Saving or other Colour Correction facilities switched off
If you are unsure whether the printer is compatible then please contact Magicomm for advice.
2. Download the Print Client
If you have not done so already you will need to download the Magicomm OpenForms Print Client. This is a piece of software that connects your printer to OpenForms allowing it to print.
NOTE: If you already have a printer installed you may not need to download this software again. Instead, you can skip to step 3 and configure the new printer.
Download the Magicomm OpenForms Print Client
3. Install the New Printer
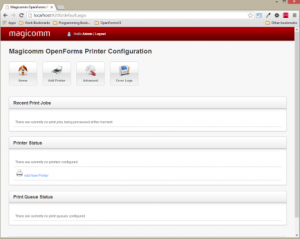
Once the software has installed you can access the configuration page by navigating to the following link on the machine that the software has been installed on:
Open Printer Configuration Website (http://localhost:9200/)
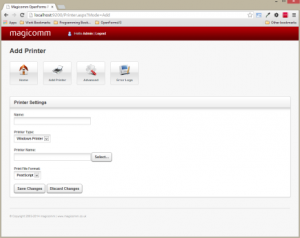
Now click on “Add Printer” at the top of the screen:
Complete the requested information and click “Save Changes”:
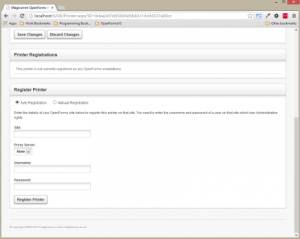
Now you can register the printer with OpenForms. Scroll down to the bottom of the page to the section entitled Register Printer. Fill in the details and click “Register Printer”.